It is proven that by using software shortcuts can boost up productivity. Here are 30 secret Photoshop shortcuts. Well, what I mean by "secret" is that these shortcuts are not documented in the menus. Keep reading and you will find how these shortcuts can speed up your productivity. I bet you don't know all of them.
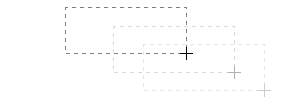
Note: this article is written in Mac Photoshop format. If you are using PC, Cmd = Ctrl and Opt = Alt.- Drag selection
With the Marquee tool, drag on the document (do not release the mouse yet), now hold down Spacebar, it will let you drag the undefined selection.
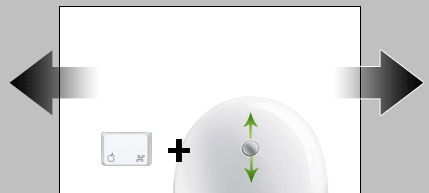
- Navigate the document left or right
Hold down the Cmd key and scroll up or down allows you to navigate the document left or right. For example, hold down Cmd + scroll up will navigate to right.
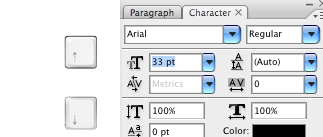
- Browse the font list
Put your cursor in the font list dropdown, you can browse the font list by pressing arrow Up or Down key.
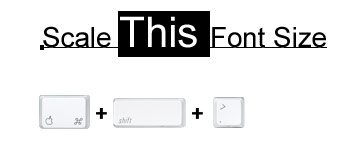
- Scale font size
Select the text that you want to scale the font size, press Cmd + Shift + > or < to increase / decrease font size.
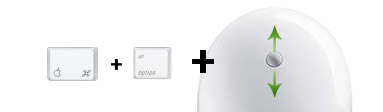
- Zoom with the scroll wheel
You can zoom in / out by Cmd + Opt + scroll up or down.
- Drag to adjust numberic value
Mouseover the input box, hold down Cmd + drag left or right to increase / decrease. Hold down Cmd + Opt or Shift key and drag can change the value in decimal or 10 interval. This shortcut works in all dialog palettes.
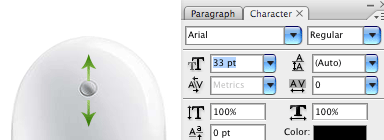
- Scroll to adjust numeric value
Put the cursor in the input box, scroll up or down to increase / decrease value. This shortcut works in all dialog palettes.
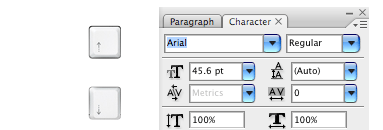
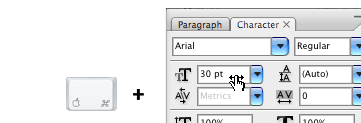
- Arrow up / down to adjust numeric value
Put the cursor in the input box, press arrow Up or Down to increase / decrease. Hold down Shift and press arrow Up or Down will change value in 10 interval.
- Zoom to 100%
Double click on the Zoom tool will zoom document to 100%.
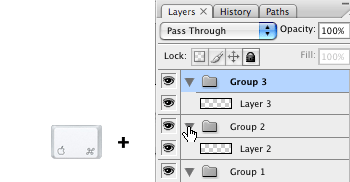
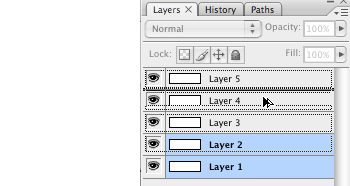
- Collapse or expand all layer groups
You can collapse or expand all root-level layer groups by holding down Cmd + click on the triangle icon. Hold down Cmd + Opt + click on the triangle icon will collapse or expand all level layer groups.
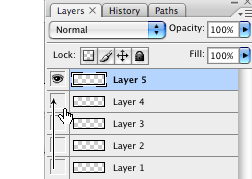
- Show / hide in a row
If you need to show / hide more than one layers, instead of clicking one by one, you can click on the visibility icon and drag in a row.
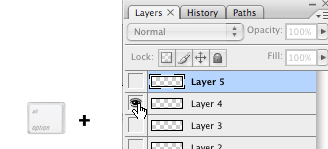
- Hide other layers
Hold down Opt + click on the visibility icon will hide all other layers.
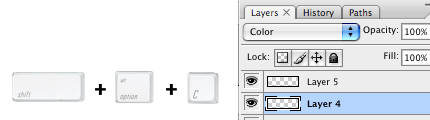
- Navigate layer blending mode
Opt + Shift + "-" or "+" key allows you to navigate through the blending mode dropdown.
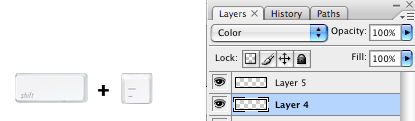
- Set specific blending mode
Opt + Shift + C, N, M, S, D... allows to set layer to specific blending mode.
For examples:
Normal = Opt + Shift + N
Screen = Opt + Shift + S
Multiply = Opt + Shift + M
Color = Opt + Shift + C
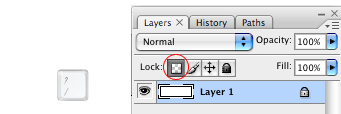
- Lock layer transparency
Press forward slash ("/") to lock layer transparency.
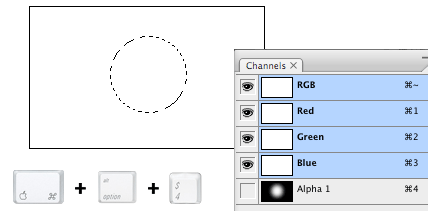
- Load Channel selection
You probably know that Cmd + number keys (1, 2, 3) will activate the channels in sequent. Press Cmd + Opt + number keys will load the selection. For example, press Cmd + Opt + 4 will load Alpha channel 1.
- Tool panels
Press Tab to toggle tool panels.

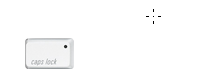
- Precise cursor
Caps lock will display tool cursor in precise mode.
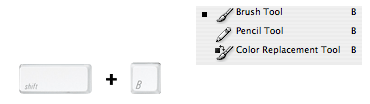
- Navigate the tool list
You can navigate through the tool list by pressing Shift + tool shorcut. For example: B = Brush tool, if you press Shift + B again, you will switch to Pencil tool.
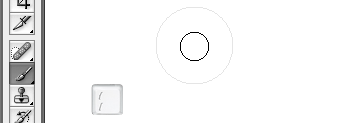
- Increase / decrease brush size
With the Brush tool selected, you can increase / decrease the brush size by pressing [ or ] key (square bracket key). Press Shift + [ or ] will increase / decrease brush hardness.
- Opacity
You can set the layer opacity by pressing the number keys (ie. 1 = 10%, 2 = 20%...). When you have the brush tool selected, pressing the number keys will adjust the brush opacity.

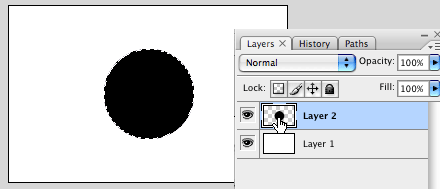
- Duplicate layer
There are several shortcuts to duplicate layers.
1. You can hold down Cmd + Opt + drag to duplicate the active layer.
2. Cmd + Opt + arrow keys (Up, Down, Left, Right).
3. Cmd + J will duplicate the active layer in exact position.
4. Hold down Opt + drag within the Layers palette can also duplicate layers.
- Copy visible and paste in a new layer
Press Cmd + Opt + Shift + E will copy the visible layers and paste in a new layer.

- Change workspace background
By default Photoshop use grey for the workspace background color. You can change that by:
1. select your favorite color
2. choose the Paint Bucket tool
3. Hold down Shift + click on the working area (outside the document area)
Update: right-click on the workspace area to get a dropdown menu - allows you to set the background to black, grey, or a custom color (commented by Todd Patrick).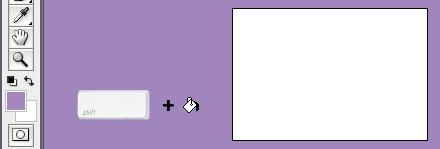
- Fill background or foreground color
Opt + Delete (Backspace) = fill the layer with foreground color.
Cmd + Delete (Backspace) = fill the layer with background color
Update: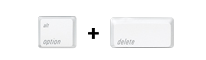
Cmd + Shift + Delete (Backspace) = Fill non-transparent pixels with background color Opt + Shift + Delete (Backspace) = Fill non-transparent pixels with foreground color
(commented by André Dion)
- Switch between document windows
Ctrl + Tab will switch between document windows.

- Load layer transparent
Cmd + click on the layer thumbnail will load its transparency.
- Scale proportionally from center
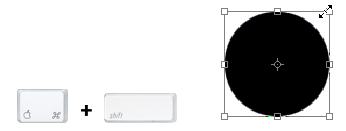
When you are using the Marquee tools or Free Transform, hold down Opt + Shift + drag will scale proportionally from the center.
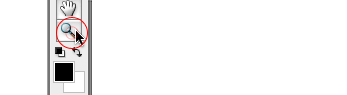
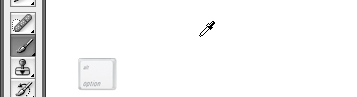
- Shortcut to Eyedropper
If you have the Brush tool selected, hold down Opt key will quickly activate the Eyedropper tool. Hold down Opt + Shift will activate the Color Sampler Tool.
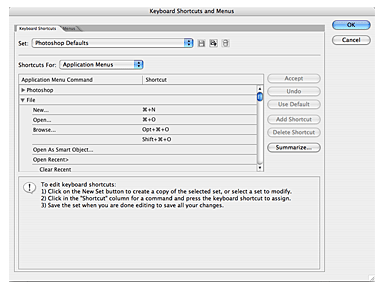
- Finally...
Finally, if you want to check or set your own custom shortcuts, press Cmd + Opt + Shift + K will bring up the Keyboard Shortcuts panel.